|
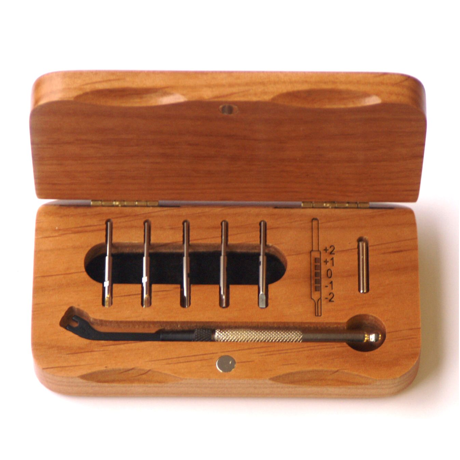
USING the RhAT Tool Sets - Two Different Tools Sets, Same Results
To use either of the RhAT tool sets, your machine must use round embroidery needles and the presser foot must have a hole larger than .105" in diameter in at least one of the needle postions on each head.
The ORIGINAL RhAT Tool Set
To use the ORIGINAL RhAT tools, the Main Shaft of the machine must be able to be rotated to the setting position, either mechanically or electronically, while the needle bar is disengaged and free to be lowered independently. If you can turn your machine’s Main Shaft manually without the needle bar moving, you should be able to use the ORIGINAL RhAT Tools Set.
Many of the larger and multiple head Tajima and SWF machines have a Needle Bar Suspension Lever which makes it simple to use the ORIGINAL RhAT. Some single head Tajimas and Toyota machines without a lever may still be able to use the ORIGINAL, as can some machines from other manufacturers. See the instructions under Tajima Users.
Before you attempt to turn your Main Shaft manually, make sure you know where the home postiion is, as you will need to return the Main Shaft to the correct radial postition to restart your machine.
If there is no manual disconnect, check to see if there is a way that you can disconnect the Needle Bar from the Main Shaft electrically, this may be as simple as turning off power to a sewing head. To use the ORIGINAL RhAT tools, the needle bar must be able to be lowered once the machine is rotated manually to it's proper timing mark. The ORIGINAL RhAT tool is the simplest to use of the two tool sets, although the RhAT II tools sets will work on machines that the ORIGINAL RhAT tools set will work on in addition to those machines that have no means of disengaging the Needle Bar from the Main Shaft.
The RhAT II Universal Tool Set
On many machines, there is no mechanical or electrical disconnet posible of the needle bar from the main shaft, so the RhAT II Universal tool set was delveloped. The Original RhAT tool set is easier to use if disconnect is possible.
Using the RhAT II Tools is fairly simple and they should work on most machines. You must be able to turn the shaft manually. it may help if you have someone assist you the first time you use the tool..
On some machines, the power must be on to release the Main Shaft's brake. On other machines, turning off power ro the machine will release the brake.
Before you attempt to turn your Main Shaft manually, make sure you know where the home postiion is, as you will need to return the Main Shaft to the correct radial postition to restart your machine.
Using the ORIGINAL RhAT
The link following opens a pdf file. Note, this file has a lot of pictures and details. It is about 3.5 MB in size. Please wait for it to load.
Adjusting the Rotary Hook with the ORIGINAL RhAT
Or you can view the You Tube Video on using the ORIGINAL RhAT.
Using the RhAT II Tool SET
The link following opens a pdf file. Note, this file has a lot of pictures and details. It is about 5 MB in size. Please wait for it to load.
Adjusting the Rotary Hook with the UNIVERSAL RhAT III
Or you can view the You Tube Video on using the RhAT II.
.
Sewout Test Pattern
Use one of the links following to download the test pattern. the test pattern has 16
four sided shapes and 16 borders. Set one up for each
color of thread on your machine. It will check both Tatami fills and Satin stitches and it
sews out in every direction. You can see
whether all of your needles on each head are sewing the same.
Use all the needles on your machines to check your results.
Color Test Wheel EMB file
Color Test Wheel DST file
Color Test Wheel DSB file
Color Test Wheel PES file
Thread should be tight on top and only have about 1/3 of the bobbin thread showing underneath. If some colors or needles sew
better than others, check your tensions. You should invest in a Upper Thread Tension Gage and use it whenever you change threads.
Tension should always be the first thing to check when loose stitching in encountered.
Under no circumstances shall RhAT.com and it's
owners be held responsible for any possible injury to technicians or
operators, to machines, equipment, garments and apparel, either while using
the RhAT tools or after using it to make adjustments to your machine.
The RhAT tools have been made to facilitate a mechanical adjustment to the position of the Rotary Hook(s) radial and axial positions only. The RhAT tools must be removed from the machine before the machine is put under power.
|